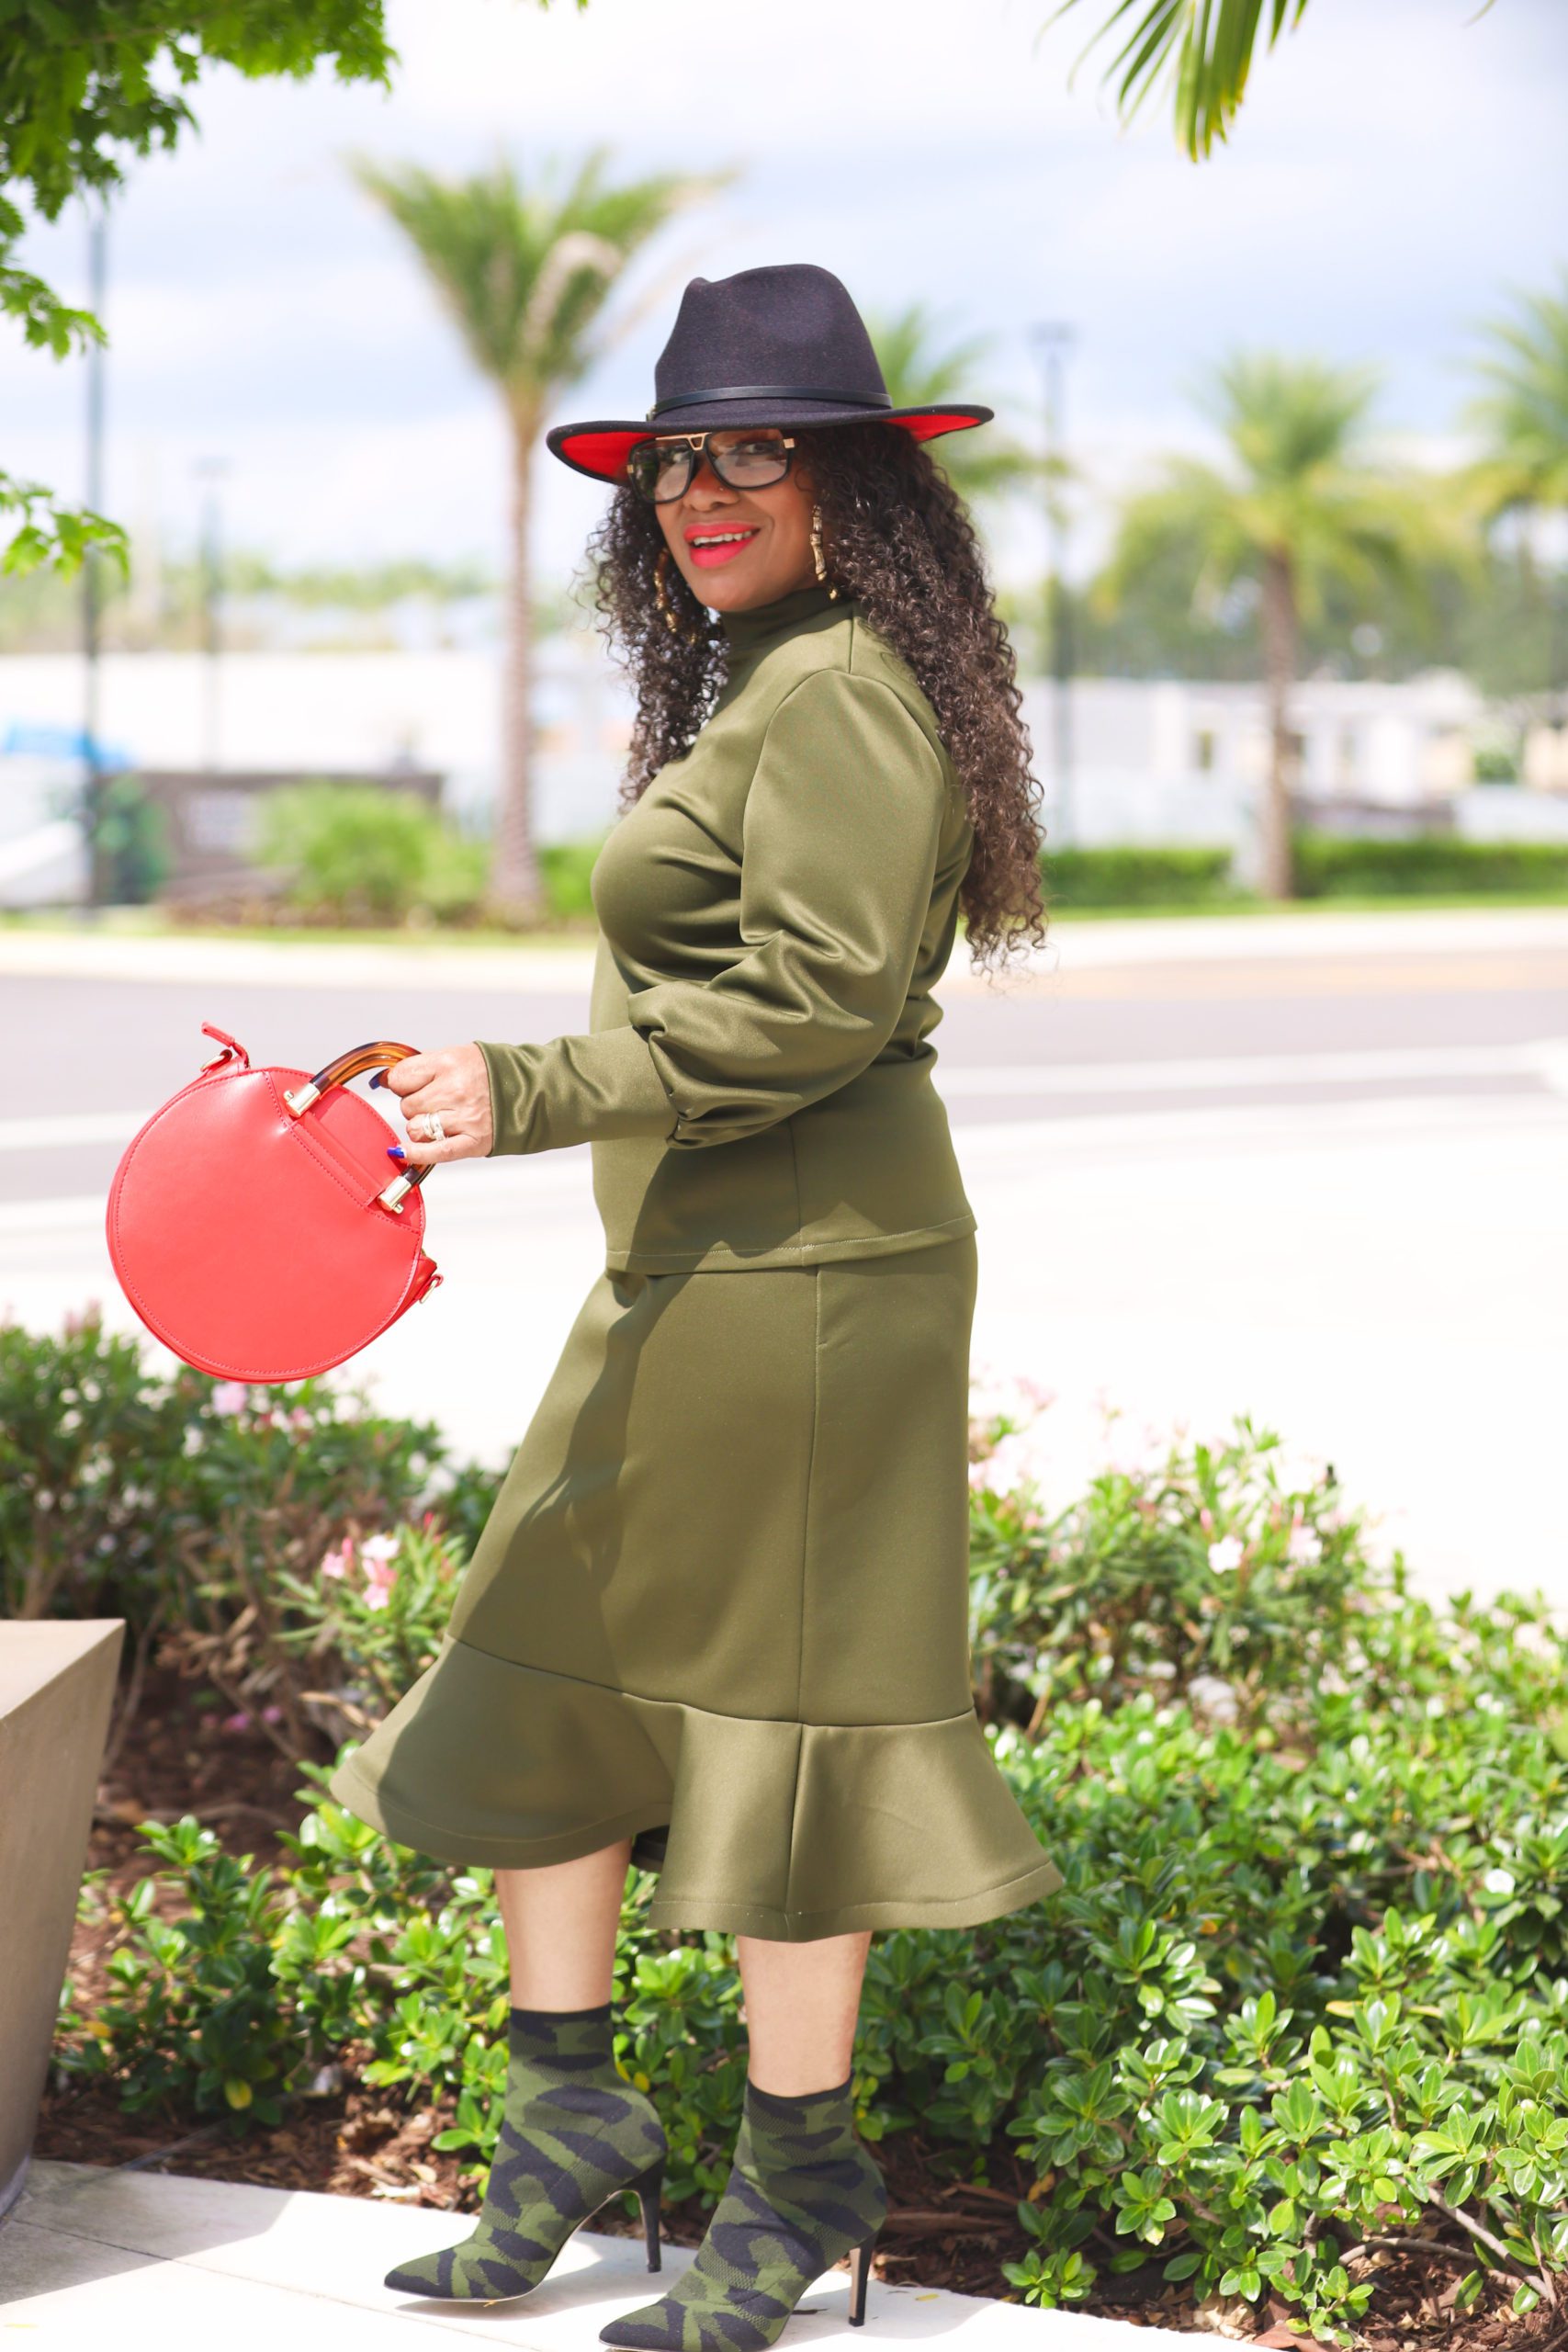
Hey Guys! Not sure if you noticed or not, but I’ve been on a bit of a ruffle kick lately. Yes, I added a ruffle to my last make, but this time I made a circle skirt and attached it to the bottom of my skirt! I decided I would document the process and share it with you all. Follow along with me on how to add a circle ruffle to the bottom of a skirt.
Things You Will Need:
- The skirt you’re adding the ruffle to.
- Measuring tape
- Scissors
- Pins
- Marking tool
- By Hand London Circle Skirt Calculator
- Making The Circle Ruffle
Before you get started, your skirt must be complete and you have to determine how long you want your circle ruffle to be. Measure from your hemline (minus the seam allowance) down to how long you want it to be. I used a 5/8 seam allowance since the skirt called for a 5/8 seam allowance.

1. Lay your skirt down flat and measure along the hemline of your skirt. This will be the “waist measurement” you will use later. Mine was 21 inches.
2. You will need to use the By Hand London Circle Skirt Calculator. Once on the By Hand London Circle Skirt Calculator, selected inches (in) or centimeter (cm) from the I would like to work in section. Next, select I would like to make a Half to make a 1/2 circle skirt. The I would like to be in a section does not apply as your circle ruffle will probably not be as long as 20″. I selected Mini, but again, it doesn’t matter.
3. Then, you want to use the drop down to select the measurement from Step 1 for the My waist is measurement. Lastly, click on Do the maths, please! and then you will receive the measurement you need for the next step. My skirt measured 21 inches across the hemline. Once I entered this measurement for my waist measurement, my final number was 6 1/4″.
4. Place your measuring tape on the folded edge and measure down the waist measurement. For me, I measured down 6 1/4 and made a mark. Holding the measuring tape in the corner, hold the measuring tape down and continue measuring and marking all around until you make it to the other edge of the fabric.
5. Starting at the marked edge, measure down to length you want your ruffle to be and do the same thing you just did in the step above. I wanted my circle ruffle to be 8 inches long so I measured down 8 inches and continue with that measurement all the way around. Once you’ve cut your 1/2 circle out, fix your fabric to be on the fold like the 1st time and cut again.
6. Now you should have 2 1/2 circles.

7. With right sides together, pin and sew the two short ends. Once you have sewn both ends together you will have an entire circle. You can use your half circle to measure around your circle to determine how much horsehair braid you will need to use. If you only measured 1/2 your circle, double that measurement for your entire circle.
8. Pin the horsehair braid on the right side of your fabric.
9. Sew it down using 1/4 inch seam allowance.
10. Once sewn down, turn the edge on the wrong side of the fabric.
11. Sew close to the furthest edge of the horsehair braid.
12. With the skirt right side out, put your skirt side your circle with right sides together and pin.
13. Sew your circle ruffle to your skirt and that’s it, you’re done!
Pattern and Construction
I used Simplicity 8982, which just happens to be this month’s @sewyourview over on Instagram. Good thing for me, because this is the second time I make this pattern! You can read all about my 1st time making this pattern HERE. For this make I made view C and E, which is the shorter skirt. This pattern is super easy and very much on trend. You can do so many things with this pattern. Maybe I’ll make it again. lol
What did you think of my make? Do you think you’ll make this pattern? If you do, let me know, I’d love to see it.
Until Next time,
Johanna

Hat @shopcaribbeancowgirl| Shades CitiTrends| Booties MIA from DSW| Bag TJMaxx 


Girl, love to see you blog,
It gets better and better every time. I am so proud. Orgullosa.
You make me want to cry. I really appreciate all the love.
This skirt is adorable, love that shade of green! (and those shoes…!!)
Thank you! I’m totally diggin this green too! Yeah, these shoes are so cool!
Wow, this really changes the skirt from “nice” to “amazing”! I may have to try this with a pencil skirt I have. Thanks for the easy to follow tutorial!
Adding the circle ruffle really does make it amazing! You should totally give it a try with your pencil skirt. I bet it would change the look completely.
Wow! What a wonderful tutorial. It was thorough and direct.
And it looks amazing on you.
Thank you for sharing.
Thank you so very much. I wanted to provide as much detail as possible.
What a great tutorial! My oldest daughter will love this
I’m so glad you enjoyed it! It was a lot of fun to do.
I love that ruffle! Your tutorial is really easy to follow, even for a beginner like me, thank you!
YAY! I know it’s a lot of steps, but I was trying to be detailed. If you ever try it and have any questions, just let me know and I’ll be glad to help.